
LUFS tells you how loud your track sounds. True peak tells you whether it could distort after it leaves your hands. You do not need the math behind either one to use them.
What does LUFS mean?
LUFS stands for Loudness Units relative to Full Scale. A peak meter shows how high the waveform goes. LUFS estimates how loud the music sounds to a person, so two masters can peak at the same level and read very differently.
You will mostly see one number for the whole song, called integrated LUFS. Meters also show short-term and momentary readings, which move while the track plays. Numbers closer to 0 are louder, so -7 LUFS is louder than -14 LUFS.
What streaming services do with it
Tracks arrive at very different levels. If a service played them as delivered, listeners would reach for the volume on every skip. So services measure each track and adjust playback toward a reference level. Spotify turns louder masters down and softer masters up.
That means a louder master does not simply play louder. Spotify does say Premium listeners can choose the level, and that its web player and third-party devices do not apply this, so a track can still reach someone unadjusted.
What LUFS does Spotify use?
Spotify plays tracks at -14 LUFS by default, its Normal level, and its page for artists also lists Loud at -11 LUFS and Quiet at -19 LUFS. A track at -9 LUFS is turned down 5 dB on Normal, so it plays at the same loudness as a track mastered at -14.
Nothing on that page tells you to master to -14. It is the level Spotify plays back at. What you master to is a creative decision.
What I aim for, by genre
It definitely changes with the genre. These are the rough numbers I go by, not rules:
- Pop: -10 to -7 LUFS
- Drum and Bass: -4 LUFS
- Trance: -7 LUFS
- Rock: -7 LUFS
- Orchestral: -18 LUFS
Most of those are louder than -14, so Spotify’s Normal setting turns them down: 7 dB for a master at -7, and 10 dB for one at -4. Whether the track still feels right after that is what the reference check further down is for.
Apple Music and YouTube
Apple Music and YouTube also adjust playback loudness. I am leaving their targets out because I could not confirm them from their own documentation, and the numbers online are secondhand. Check the current page of the service you deliver to.
What true peak is
A digital file stores samples, and the waveform can rise above those samples in the gaps between them. Sample peak is the highest sample in the file. True peak also counts the peaks in those gaps, and it is written in dBTP.
This is why a master that sits right at 0 on a regular peak meter can still clip later, when a service encodes it or a player converts it.
Where I set my ceiling
I almost always set my limiter ceiling somewhere between -0.1 and -1 dBTP, on every master, whatever the genre.
The published advice is more cautious than the top of that range. Spotify says to keep true peak below -1 dBTP, and below -2 dBTP if the master is louder than -14 LUFS. Apple recommends at least 1 dB of headroom. If you want a safe place to start, use -1 dBTP.
How I check a master against references
A number tells you what a service will do with a master. It does not tell you whether the master is good.
I usually pull in three or four records I really like, ones that match the energy and vibe I am going for. They do not even have to be the same genre. Sometimes it is a moment and sometimes the entire track, as long as it captures something I want in my own record.
I put those into my session and A/B them against my track while I mix and master. I listen to how each frequency range stands up against mine and what the key traits are. Is it warm? Deep? Crisp? Clear? Then I work with the tools I have to get as close to those results as I can.
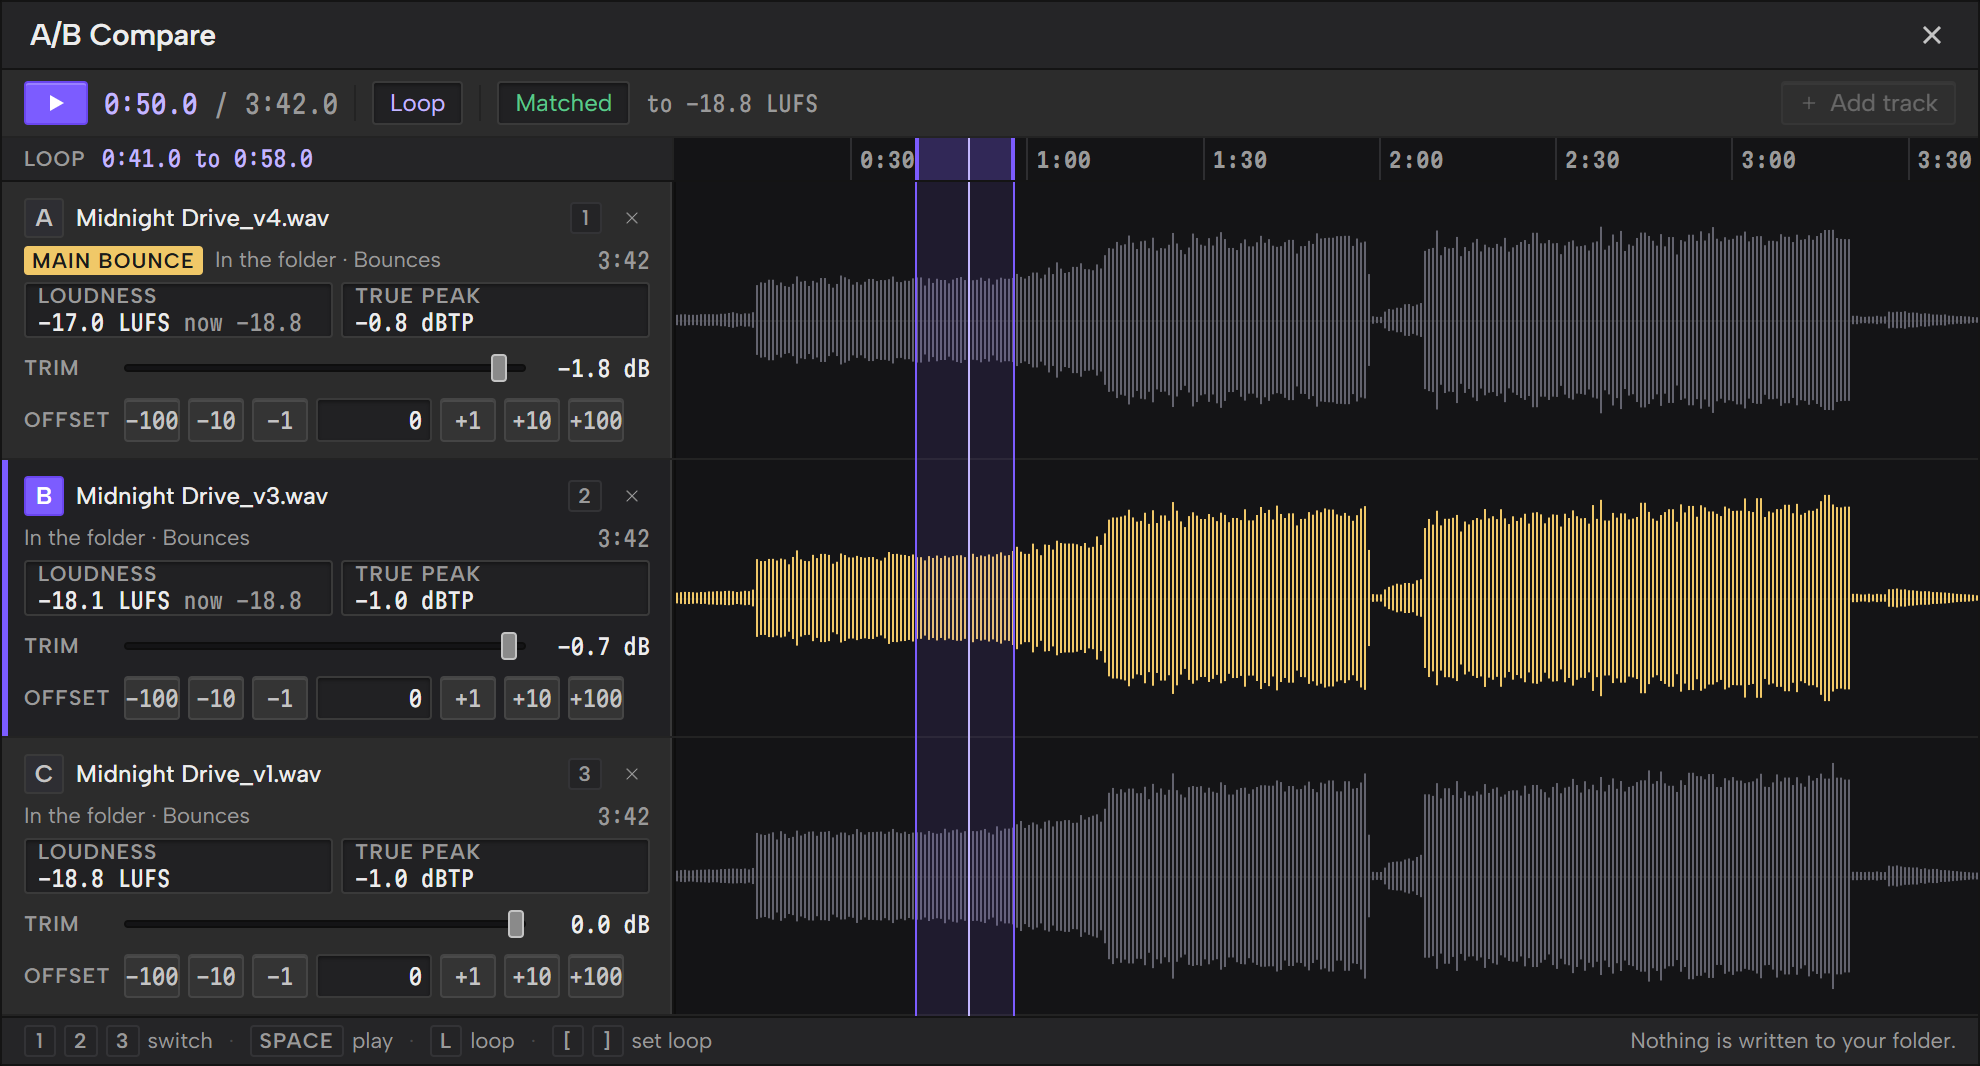
See Peak and LUFS in Outro
Outro shows both readings in the top bar. Peak and LUFS measure the project’s main bounce while it plays, and Outro keeps the reading for that bounce, so you do not measure it again. By default, Peak shows true peak and LUFS shows integrated loudness. Play the bounce through once for the full reading. A true peak or sample peak above 0 turns amber.
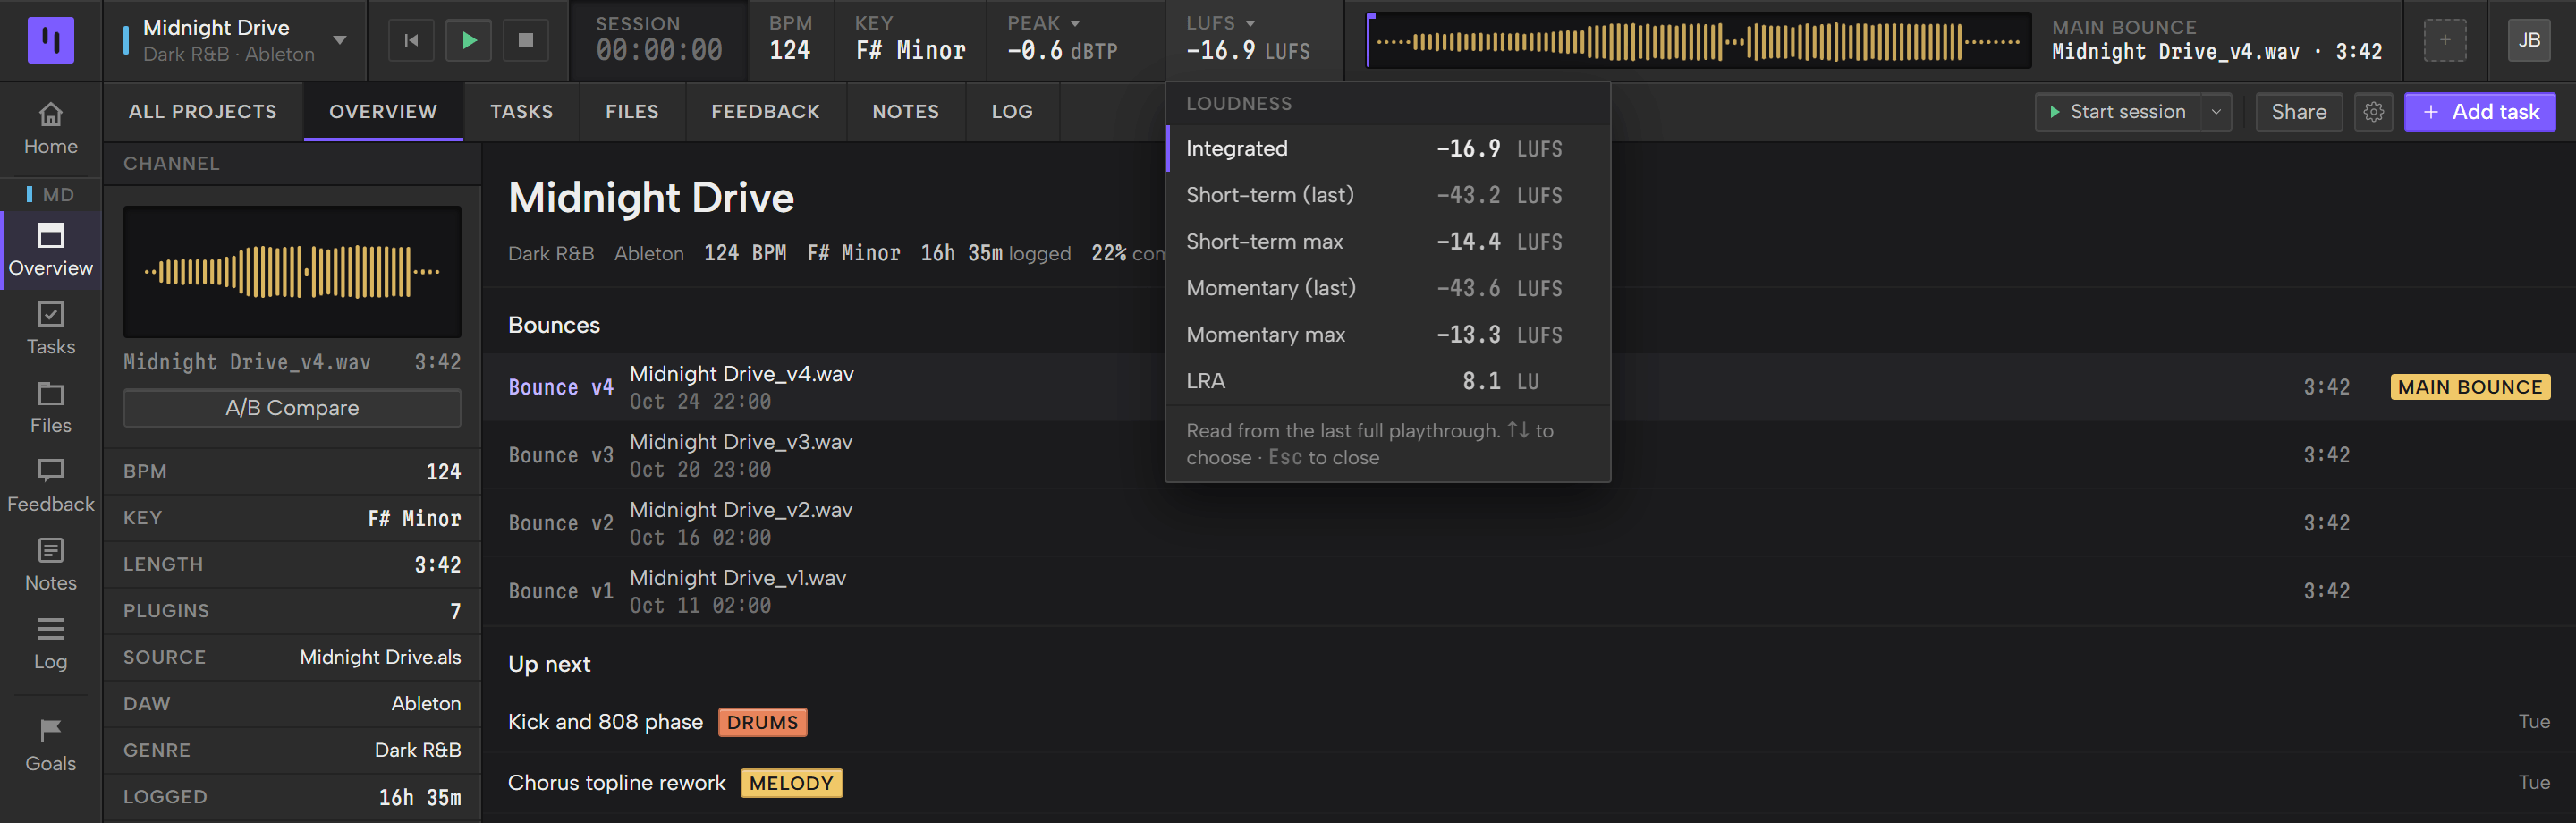
Click Peak or LUFS to pick a different measure. A/B Compare uses the same picks, and its Match button brings every track down to the quietest one, so you can compare masters at the same loudness.
Outro sits next to any DAW on Windows and Mac and is in beta. The Overview Guide covers picking a measure step by step. For how Outro keeps the tasks, files, notes and feedback for each track in one place, see project management for music producers.